ADVERTISEMENT
Electronics & Tech News
Best Settings For Apex Legends
Apex Legends is an extremely competitive video game, and getting into the top ranked games is no easy feat. One thing that can help you improve is a good attitude. To help you out with that, here's our full guide to the best settings for Apex Legends.

What does the optimal setting mean anyway?
Before we dive into the best settings for Apex Legends, we first need to explain what this even means. When we're trying to figure out the best settings for each video game, we have three main goals.
The first goal is to improve the overall frame rate. The second goal is to reduce input lag, and the ultimate goal is to improve visibility. Boosting the frame rate makes the game feel smooth and crisp. The reduction in input lag makes games feel responsive.
Raising awareness can involve several things. For example, visibility can include shadows that help spot enemies. It can also include contrast adjustments between enemies and the background, which can also help spot enemies.
Nvidia Control Panel Settings
To start changing settings through the Nvidia Control Panel, you must first open it. Go to your PC's desktop > right click > then click on NVIDIA Control Panel. A new window will open on the screen with some options in the left pane. Among the options, find and click Manage 3D Settings.
Once all of this is done, click the Program Settings tab, click the Add button, select Apex Legends, and click the Add Selected Program button. After that, copy all the settings listed below:
1. Antialiasing - AXAA (off)
2. Anti-aliasing-mode (off)
3. CUDA - GPU (all)
4. Low Latency Mode (On)
5. Multiframe sampling AA (MFAA) (off)
6. Power management mode (prefer maximum performance)
7. Preferred refresh rate (your monitor) (highest available)
8. Shader cache (on)
9. Texture Filtering - Negative LOD Bias (allowed)
10. Texture Filtering - Quality (High Performance)
11. Texture filtering - trilinear optimization (on)
12. Thread optimization (on)
13. Triple buffering (off)
14. Vertical sync (off)
In-game settings
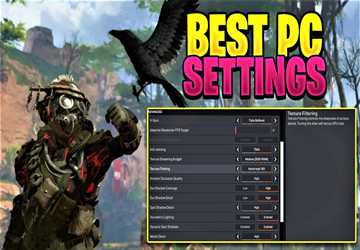
Once you're done with the Nvidia Control Panel setup, you can move on to the in-game setup. Launch the game, go to the in-game settings and click on the "Video" tab. After that, copy all the settings listed below.
1. Vertical sync (disabled)
2. NVidia Reflex (enabled)
3. Adaptive resolution FPS target (0)
4. Anti-aliasing (TSAA)
5. Texture Streaming Budget (1 or 2GB below the GPU's max VRAM)
6. Texture filtering (bilinear)
7. Ambient occlusion quality (disabled)
8. Sunshade (Low)
9. Sun Shadow Detail (Low)
10. Point Shadow Detail (Low)
11. Volumetric lighting (disabled)
12. Dynamic point shadows (disabled)
13. Model Details (Low)
14. Effect detail (low)
15. Impact Marker (disabled)
16. Ragdoll (Low)
These are the absolute minimum settings a game needs to look good while delivering a high frame rate. However, if you're still getting low framerates, you can try lowering the resolution from 1080p.
On the other hand, if your frame rate exceeds 200 FPS, you can try increasing some settings. Pick a setting and adjust it to a higher value, and see if the frame rate stays above your desired value or above 144 FPS.
Related Articles
Electronics & Tech News
September 28, 2026
Top 10 Tech Skills in High Demand for 2023

Electronics & Tech News
September 28, 2026
How to Use VPN to Access Blocked Websites?

Electronics & Tech News
September 19, 2026
Where to Find the Best Deals on Tech Gadgets Online
Electronics & Tech News
September 17, 2026
Why Upgrade to SSD? - Advantages for Faster Computing
Most viewed
7 wonders possible with CRISPR Cas technology
September 25, 2026
Electronics & Tech News
Top 8 Best Practices in IT Service Management
September 25, 2026

Electronics & Tech News
How to Optimize Your SEO Strategy for Voice Search?
September 19, 2026

Electronics & Tech News
What Are OLED Displays? - Benefits, Usage, and More
September 19, 2026
Electronics & Tech News